How to Set up a Zapier integration | Go To Flowcode
If you are using the Flowpage Contact Collection form, you can integrate it with your Zapier webhook URL to seamlessly bring in CRM data you capture via Flowpage as new customers.
The following information can be passed through each integration:
-
Flowpage (all collected data)
-
Zapier (Name, Email, Phone Number, Address, Age, Gender, Custom)
-
Mailchimp (Name, Email, Phone Number, Address, Age, Gender, Custom)
-
Klaviyo (Name, Email, Phone Number)
-
HubSpot (Name, Email, Phone Number, Address, Custom)
-
*If a Custom Field is set to “company” or “website” then it will feed that information to the “company” or “website” fields.
Note: “company” and “website” are case sensitive.*
-
-
Salesforce (Select Name as a field and make sure it is a required field
Navigating to your Flowpage
1. Click on Assets > Flowpages on the left side navigation which will take you to your Flowpages dashboard.

2. Select a Flowpage from the list view or search the Flowpage name you would like to integrate.
3. After selecting the Flowpage you would like to edit, you will be brought to the Flowpage Profile page.

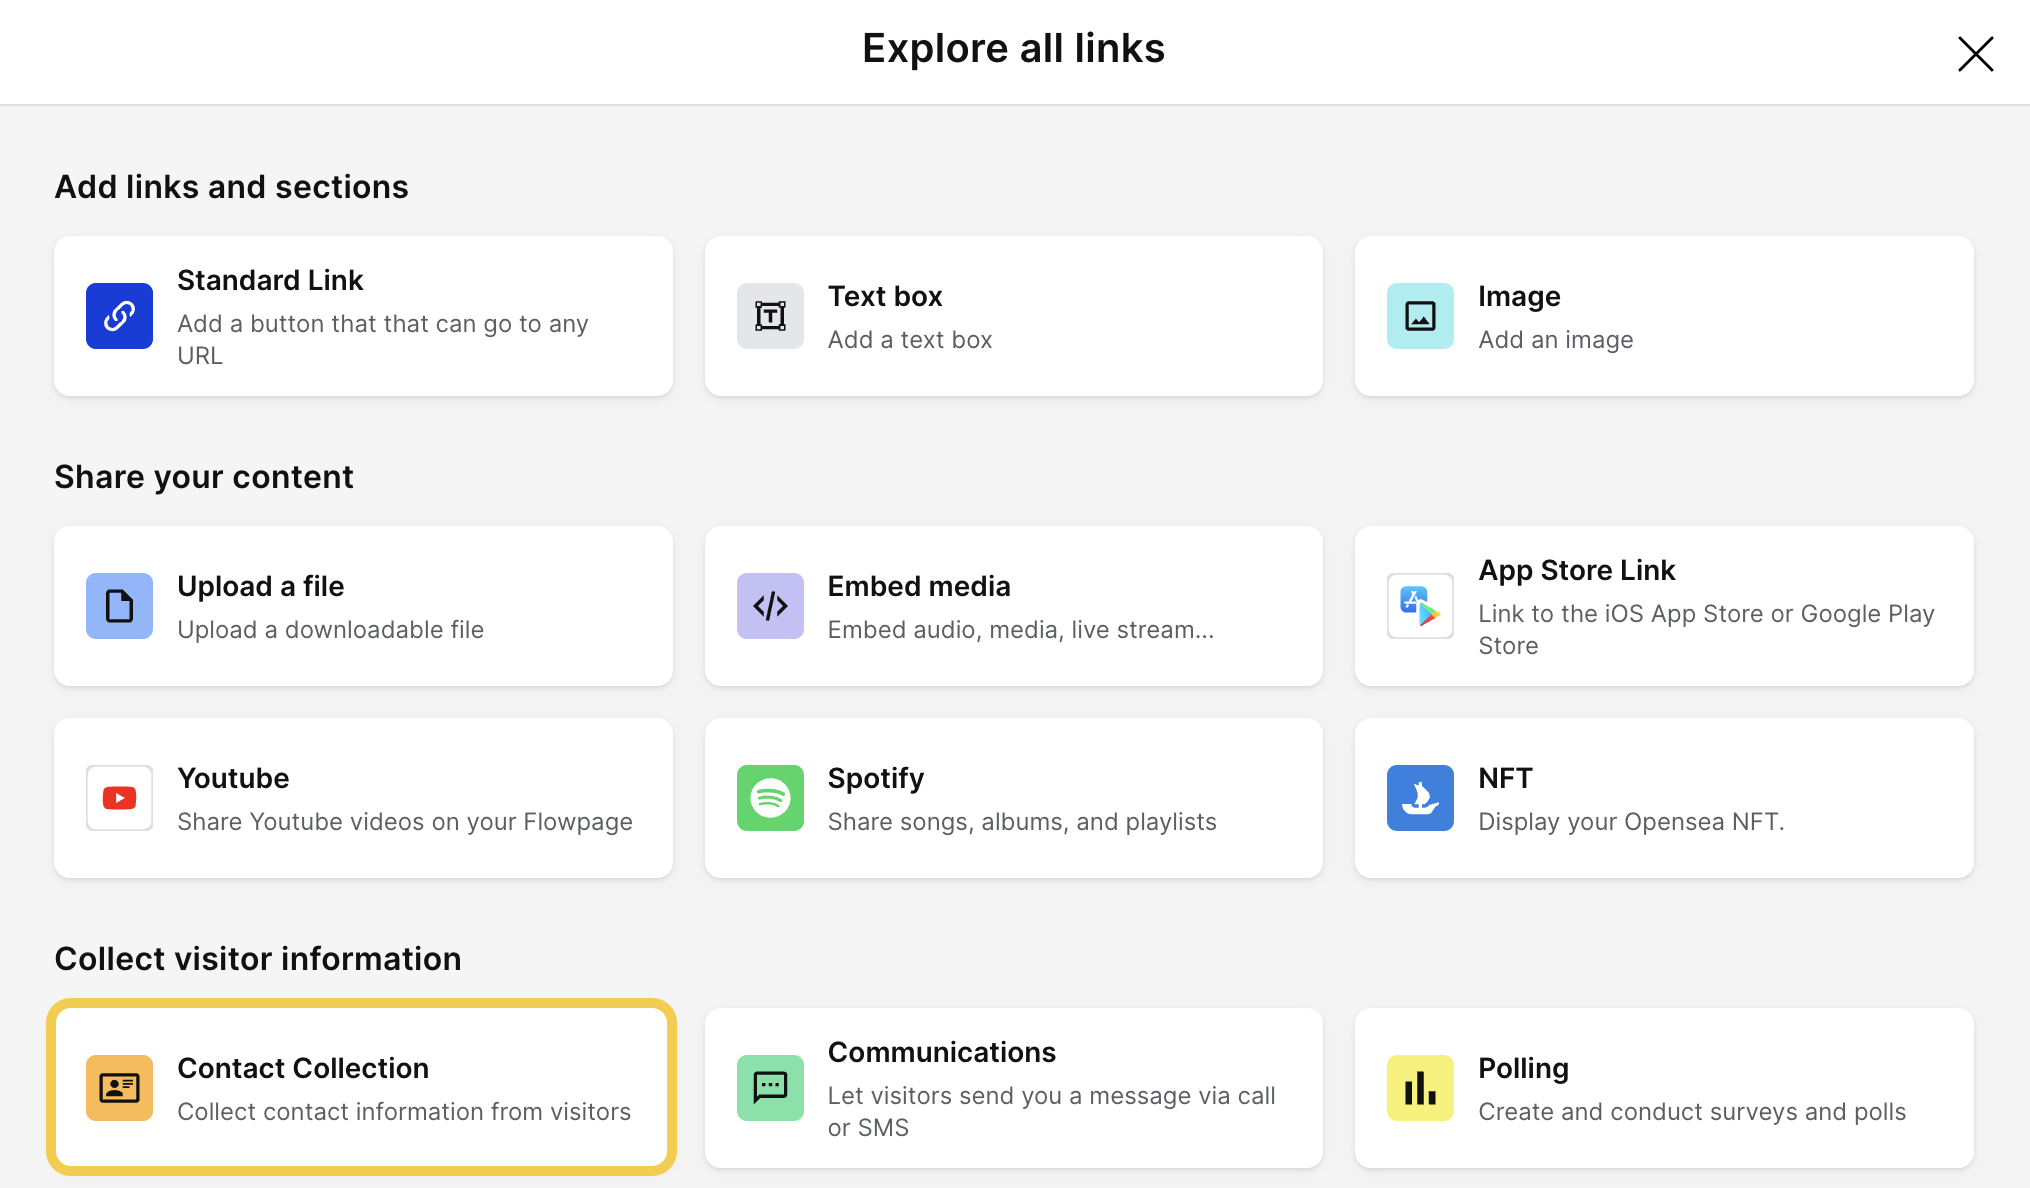
4. Either edit an existing Contact Collection form or add one to your Flowpage. Click Explore Links scroll to select Contact Collection.

4. Scroll down when editing the form to the Select where you would like responses stored section and check the Zapier checkbox.
Follow the instructions below to generate the Zapier Custom Webhook URL.
Authorizing Zapier
1. Sign up for a Zapier account here.
2. Once logged in, click Create Zap.
3. Search and select Webhooks by Zapier.
4. Choose the option Catch Hook and hit Continue.
5. Copy the Zap URL.
6. Head to your Flowpage.
7. Follow the instructions above to find your Flowpage and Contact Collection form.
8. Click the checkbox next to the Zapier option and paste the URL in Custom Webhook URL.

9. Head back to Zapier and hit Continue.
10. Hit Test Trigger. If it is unsuccessful repeat Steps 5 through 10.
11. Choose an App & Event you want to automate:
-
Send new leads a personal message using Gmail
-
Add a subscriber to Campaign Monitor, Klaviyo, or Mailchimp
-
Update your Google Sheets
-
Send updates to your Slack
-
Send Twilio SMS messages
For additional questions, please reach out to your dedicated Client Success Manager or email our team at [email protected] .